OpenStack is a free and open-source software platform which provides IAAS (infrastructure-as-a-service) for public and private clouds.
To configure hostname:
[root@cloud ~]# hostname
cloud.openstack.lan
[root@cloud ~]# hostname -f
cloud.openstack.lan
[root@cloud ~]# hostname -s
cloud
To check all running services:
[root@cloud ~]# ss -tulpn
Netid State Recv-Q Send-Q Local Address:Port Peer Address:Po rt
udp UNCONN 0 0 127.0.0.1:323 *:* users:((“chronyd”,pid=618,fd=1))
udp UNCONN 0 0 *:5353 *:* users:((“avahi-daemon”,pid=643,fd=12))
udp UNCONN 0 0 *:55073 *:* users:((“avahi-daemon”,pid=643,fd=13))
udp UNCONN 0 0 ::1:323 :::* users:((“chronyd”,pid=618,fd=2))
tcp LISTEN 0 128 *:111 *:* users:((“systemd”,pid=1,fd=50))
tcp LISTEN 0 128 *:22 *:* users:((“sshd”,pid=12309,fd=3))
tcp LISTEN 0 128 127.0.0.1:631 *:* users:((“cupsd”,pid=742,fd=12))
tcp LISTEN 0 100 127.0.0.1:25 *:* users:((“master”,pid=1432,fd=13))
tcp LISTEN 0 128 :::111 :::* users:((“systemd”,pid=1,fd=49))
tcp LISTEN 0 128 :::22 :::* users:((“sshd”,pid=12309,fd=4))
tcp LISTEN 0 128 ::1:631 :::* users:((“cupsd”,pid=742,fd=11))
To stop, disable or remove unwanted services:
[root@cloud ~]# systemctl stop postfix firewalld NetworkManager
[root@cloud ~]# systemctl disable postfix
[root@cloud ~]# systemctl disable firewalld
[root@cloud ~]# systemctl disable NetworkManager
[root@cloud ~]# systemctl mask NetworkManager
Created symlink from /etc/systemd/system/NetworkManager.service to /dev/null.
[root@cloud ~]# yum remove postfix NetworkManager NetworkManager-libnm
To disable Selinux:
[root@cloud ~]# vi /etc/selinux/config
enforcing to disabled
To install ntp for synchronize time with a NTP server
[root@cloud ~]# yum install ntpdate
Loaded plugins: fastestmirror, langpacks
Loading mirror speeds from cached hostfile
* base: centos.excellmedia.net
* extras: centos.excellmedia.net
* updates: centos.excellmedia.net
Resolving Dependencies
–> Running transaction check
—> Package ntpdate.x86_64 0:4.2.6p5-25.el7.centos will be updated
–> Processing Dependency: ntpdate = 4.2.6p5-25.el7.centos for package: ntp-4.2.6p5-25.el7.centos.x86_64
—> Package ntpdate.x86_64 0:4.2.6p5-25.el7.centos.1 will be an update
–> Running transaction check
Complete!
To Install OpenStack in CentOS:
[root@cloud ~]# yum install https://www.rdoproject.org/repos/rdo-release.rpm
Loaded plugins: fastestmirror, langpacks
rdo-release.rpm | 5.2 kB 00:00:00
Examining /var/tmp/yum-root-VZ95CL/rdo-release.rpm: rdo-release-newton-4.noarch
Marking /var/tmp/yum-root-VZ95CL/rdo-release.rpm to be installed
Resolving Dependencies
–> Running transaction check
—> Package rdo-release.noarch 0:newton-4 will be installed
–> Finished Dependency Resolution
Dependencies Resolved
=========================================================================================================
Package Arch Version Repository Size
=========================================================================================================
Installing:
rdo-release noarch newton-4 /rdo-release 3.2 k
Transaction Summary
=========================================================================================================
Install 1 Package
Total size: 3.2 k
Installed size: 3.2 k
Is this ok [y/d/N]: y
Downloading packages:
Running transaction check
Running transaction test
Transaction test succeeded
Running transaction
Installing : rdo-release-newton-4.noarch 1/1
Verifying : rdo-release-newton-4.noarch 1/1
Installed:
rdo-release.noarch 0:newton-4
Complete!
[root@cloud ~]# yum install -y centos-release-openstack-mitaka
Loaded plugins: fastestmirror, langpacks
openstack-newton | 2.9 kB 00:00:00
rdo-qemu-ev | 2.9 kB 00:00:00
(1/2): rdo-qemu-ev/x86_64/primary_db | 52 kB 00:00:01
(2/2): openstack-newton/x86_64/primary_db | 854 kB 00:00:08
Loading mirror speeds from cached hostfile
* base: centos.excellmedia.net
* extras: centos.excellmedia.net
* updates: centos.excellmedia.net
Resolving Dependencies
–> Running transaction check
—> Package centos-release-openstack-mitaka.noarch 0:1-5.el7 will be installed
–> Processing Dependency: centos-release-qemu-ev for package: centos-release-openstack-mitaka-1-5.el7.noarch
–> Processing Dependency: centos-release-ceph-hammer for package: centos-release-openstack-mitaka-1-5.el7.noarch
–> Running transaction check
—> Package centos-release-ceph-hammer.noarch 0:1.0-5.el7.centos will be installed
–> Processing Dependency: centos-release-storage-common for package: centos-release-ceph-hammer-1.0-5.el7.centos.noarch
—> Package centos-release-qemu-ev.noarch 0:1.0-1.el7 will be installed
–> Processing Dependency: centos-release-virt-common for package: centos-release-qemu-ev-1.0-1.el7.noarch
–> Running transaction check
—> Package centos-release-storage-common.noarch 0:1-2.el7.centos will be installed
—> Package centos-release-virt-common.noarch 0:1-1.el7.centos will be installed
–> Finished Dependency Resolution
Dependencies Resolved
=========================================================================================================
Package Arch Version Repository Size
=========================================================================================================
Installing:
centos-release-openstack-mitaka noarch 1-5.el7 extras 5.3 k
Installing for dependencies:
centos-release-ceph-hammer noarch 1.0-5.el7.centos extras 4.5 k
centos-release-qemu-ev noarch 1.0-1.el7 extras 11 k
centos-release-storage-common noarch 1-2.el7.centos extras 4.5 k
centos-release-virt-common noarch 1-1.el7.centos extras 4.5 k
Transaction Summary
=========================================================================================================
Install 1 Package (+4 Dependent packages)
Total download size: 30 k
Installed size: 23 k
Downloading packages:
(1/5): centos-release-ceph-hammer-1.0-5.el7.centos.noarch.rpm | 4.5 kB 00:00:00
(2/5): centos-release-openstack-mitaka-1-5.el7.noarch.rpm | 5.3 kB 00:00:00
(3/5): centos-release-qemu-ev-1.0-1.el7.noarch.rpm | 11 kB 00:00:01
(4/5): centos-release-storage-common-1-2.el7.centos.noarch.rpm | 4.5 kB 00:00:01
(5/5): centos-release-virt-common-1-1.el7.centos.noarch.rpm | 4.5 kB 00:00:02
———————————————————————————————————
Total 8.7 kB/s | 30 kB 00:00:03
Running transaction check
Running transaction test
Transaction test succeeded
Running transaction
Installing : centos-release-virt-common-1-1.el7.centos.noarch 1/5
Installing : centos-release-qemu-ev-1.0-1.el7.noarch 2/5
Installing : centos-release-storage-common-1-2.el7.centos.noarch 3/5
Installing : centos-release-ceph-hammer-1.0-5.el7.centos.noarch 4/5
Installing : centos-release-openstack-mitaka-1-5.el7.noarch 5/5
Verifying : centos-release-storage-common-1-2.el7.centos.noarch 1/5
Verifying : centos-release-openstack-mitaka-1-5.el7.noarch 2/5
Verifying : centos-release-ceph-hammer-1.0-5.el7.centos.noarch 3/5
Verifying : centos-release-virt-common-1-1.el7.centos.noarch 4/5
Verifying : centos-release-qemu-ev-1.0-1.el7.noarch 5/5
Installed:
centos-release-openstack-mitaka.noarch 0:1-5.el7
Dependency Installed:
centos-release-ceph-hammer.noarch 0:1.0-5.el7.centos
centos-release-qemu-ev.noarch 0:1.0-1.el7
centos-release-storage-common.noarch 0:1-2.el7.centos
centos-release-virt-common.noarch 0:1-1.el7.centos
Complete!
[root@cloud ~]# yum install openstack-packstack
[root@cloud ~]# packstack –gen-answer-file=24.02.17.conf
Packstack changed given value to required value /root/.ssh/id_rsa.pub
[root@cloud ~]# ls
24.02.17.conf anaconda-ks.cfg initial-setup-ks.cfg
[root@cloud ~]# vi 24.02.17.conf
# NTP Server
CONFIG_NTP_SERVERS=<NTP_Server_IP>
# Disable Demo Version
CONFIG_PROVISION_DEMO=n
# Set KeyStone Admin Password or Admin user Password
CONFIG_KEYSTONE_ADMIN_PW=mypassword
# Config Horizon over SSL
CONFIG_HORIZON_SSL=y
# Disable Nagios
CONFIG_NAGIOS_INSTALL=n
save and exit
[root@cloud ~]# yum install httpd
Resolving Dependencies
–> Running transaction check
—> Package httpd.x86_64 0:2.4.6-45.el7.centos will be installed
–> Processing Dependency: httpd-tools = 2.4.6-45.el7.centos for package: httpd-2.4.6-45.el7.centos.x86_64
Complete!
To generated answer configuration file with current date:
[root@cloud ~]# packstack –answer-file 24.02.17.conf
Welcome to the Packstack setup utility
The installation log file is available at: /var/tmp/packstack/20170224-112443-eqHTim/openstack-setup.log
Installing:
Clean Up [ DONE ]
Discovering ip protocol version [ DONE ]
Setting up ssh keys [ DONE ]
Preparing servers [ DONE ]
Pre installing Puppet and discovering hosts’ details [ DONE ]
Preparing pre-install entries [ DONE ]
Installing time synchronization via NTP [ DONE ]
Setting up CACERT [ DONE ]
Preparing AMQP entries [ DONE ]
Preparing MariaDB entries [ DONE ]
Fixing Keystone LDAP config parameters to be undef if empty[ DONE ]
Preparing Keystone entries [ DONE ]
Preparing Glance entries [ DONE ]
Checking if the Cinder server has a cinder-volumes vg[ DONE ]
Preparing Cinder entries [ DONE ]
Preparing Nova API entries [ DONE ]
Creating ssh keys for Nova migration [ DONE ]
Gathering ssh host keys for Nova migration [ DONE ]
Preparing Nova Compute entries [ DONE ]
Preparing Nova Scheduler entries [ DONE ]
Preparing Nova VNC Proxy entries [ DONE ]
Preparing OpenStack Network-related Nova entries [ DONE ]
Preparing Nova Common entries [ DONE ]
Preparing Neutron LBaaS Agent entries [ DONE ]
Preparing Neutron API entries [ DONE ]
Preparing Neutron L3 entries [ DONE ]
Preparing Neutron L2 Agent entries [ DONE ]
Preparing Neutron DHCP Agent entries [ DONE ]
Preparing Neutron Metering Agent entries [ DONE ]
Checking if NetworkManager is enabled and running [ DONE ]
Preparing OpenStack Client entries [ DONE ]
Preparing Horizon entries [ DONE ]
Preparing Swift builder entries [ DONE ]
Preparing Swift proxy entries [ DONE ]
Preparing Swift storage entries [ DONE ]
Preparing Gnocchi entries [ DONE ]
Preparing MongoDB entries [ DONE ]
Preparing Redis entries [ DONE ]
Preparing Ceilometer entries [ DONE ]
Preparing Aodh entries [ DONE ]
Preparing Nagios server entries [ DONE ]
Preparing Nagios host entries [ DONE ]
Preparing Puppet manifests [ DONE ]
Copying Puppet modules and manifests [ DONE ]
Applying 10.100.100.123_controller.pp
Testing if puppet apply is finished: 10.100.100.123_controller.pp [ \ ]
10.100.100.123_controller.pp: [ DONE ]
Applying 10.100.100.123_network.pp
10.100.100.123_network.pp: [ DONE ]
Applying 10.100.100.123_compute.pp
10.100.100.123_compute.pp: [ DONE ]
Applying Puppet manifests [ DONE ]
Finalizing [ DONE ]
**** Installation completed successfully ******
Additional information:
* File /root/keystonerc_admin has been created on OpenStack client host 10.100.100.123. To use the command line tools you need to source the file.
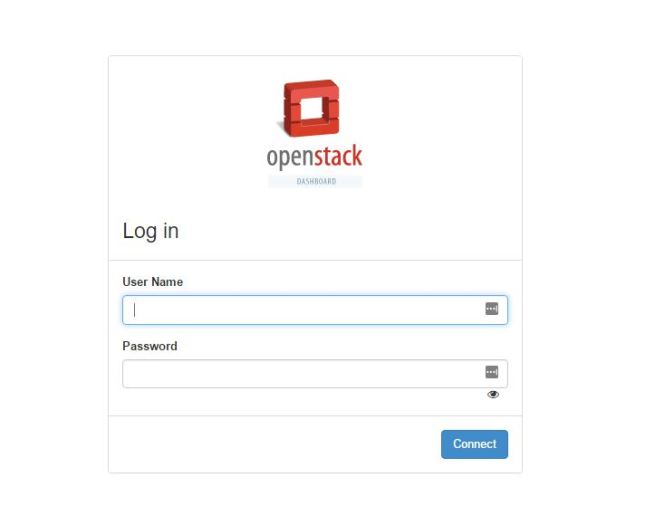
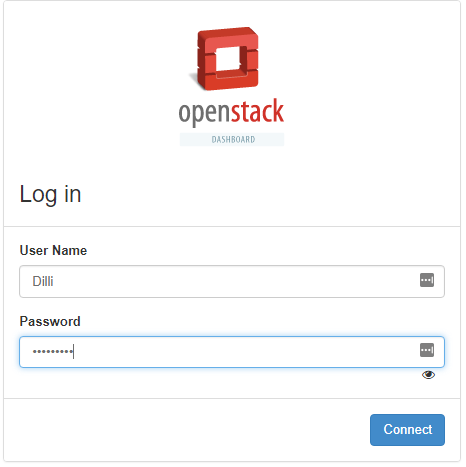
* To access the OpenStack Dashboard browse to http://10.100.100.123/dashboard .
Please, find your login credentials stored in the keystonerc_admin in your home directory.
* To use Nagios, browse to http://10.100.100.123/nagios username: nagiosadmin, password: password
* The installation log file is available at: /var/tmp/packstack/20170224-112443-eqHTim/openstack-setup.log
* The generated manifests are available at: /var/tmp/packstack/20170224-112443-eqHTim/manifests
[root@cloud ~]#