How to Configure OpenStack Network to Enable Access to OpenStack Instances
1. To Create OpenStack networks from dashboard, first we need to create an OVS bridge and modify our physical network interface to bind as a port to OVS bridge.
[root@cloud /]# cd /etc/sysconfig/network-scripts/
[root@cloud network-scripts]# ls
1 ifdown-ovs ifup-eth ifup-sit
ifcfg-br-ex ifdown-post ifup-ib ifup-Team
ifcfg-eth0 ifdown-ppp ifup-ippp ifup-TeamPort
ifcfg-lo ifdown-routes ifup-ipv6 ifup-tunnel
ifdown ifdown-sit ifup-isdn ifup-wireless
ifdown-bnep ifdown-Team ifup-ovs init.ipv6-global
ifdown-eth ifdown-TeamPort ifup-plip network-functions
ifdown-ib ifdown-tunnel ifup-plusb network-functions-ipv6
ifdown-ippp ifup ifup-post
ifdown-ipv6 ifup-aliases ifup-ppp
ifdown-isdn ifup-bnep ifup-routes
[root@cloud network-scripts]# cp ifcfg-eth0 ifcfg-br-ex
2. To edit and modify the bridge interface (br-ex) using a text editor as illustrated below:
[root@cloud network-scripts]# vi ifcfg-br-ex
HWADDR=00:0C:29:A4:F9:49
TYPE=Ethernet
BOOTPROTO=static
IPADDR=10.100.100.123
PREFIX=24
GATEWAY=10.100.100.1
DNS1=8.8.8.8
DEFROUTE=yes
IPV4_FAILURE_FATAL=no
IPV6INIT=yes
IPV6_AUTOCONF=yes
IPV6_DEFROUTE=yes
IPV6_PEERDNS=yes
IPV6_PEERROUTES=yes
IPV6_FAILURE_FATAL=no
IPV6_PRIVACY=no
IPV6_ADDR_GEN_MODE=stable-privacy
NAME=”br-ex”
UUID=4c45f763-8c4c-38d1-af88-b7e6283c652f
ONBOOT=yes
AUTOCONNECT_PRIORITY=-999
save and exit
3. We need to do same with physical interface and make sure like as follow:
[root@cloud network-scripts]# vi ifcfg-eth0
TYPE=Ethernet
BOOTPROTO=none
DEFROUTE=yes
IPV4_FAILURE_FATAL=no
IPV6INIT=no
IPV6_AUTOCONF=no
IPV6_DEFROUTE=no
IPV6_PEERDNS=no
IPV6_PEERROUTES=no
IPV6_FAILURE_FATAL=no
IPV6_PRIVACY=no
ONBOOT=yes
TYPE=OVSPort
DEVICETYPE=ovs
OVS_BRIDGE=br-ex
save and exit
4. Restart network
[root@cloud network-scripts]# systemctl restart network.serivce
5. Then we need to do like as follow:
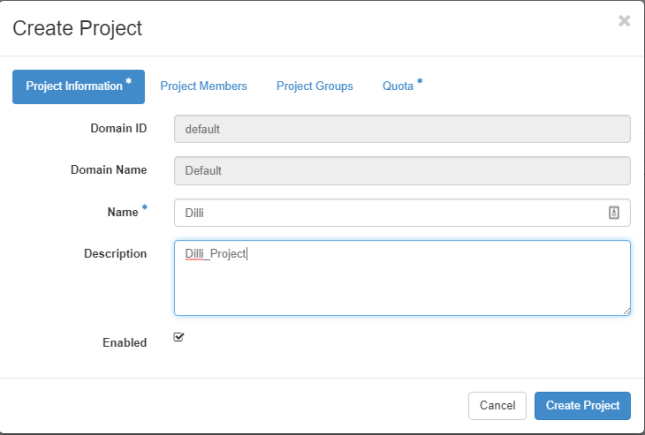
Login to Openstack web panel (dashboard) with admin credentials and go to Identity -> Projects -> Create Project and create a new project
Next, navigate to Identity -> Users -> Create User and create a new user by filling all the fields with the required information.
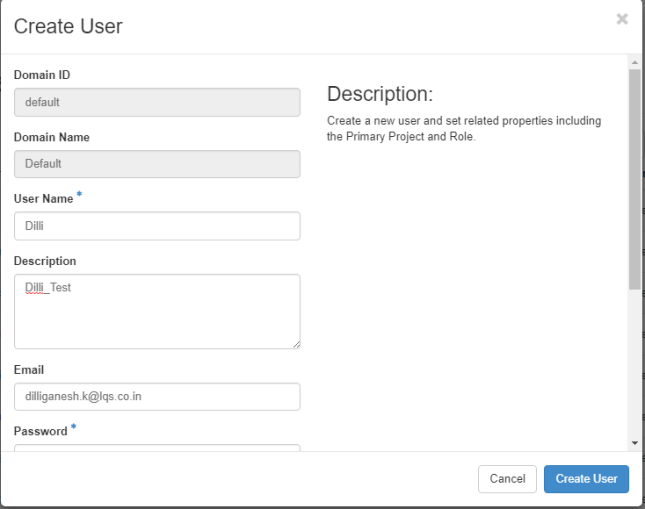
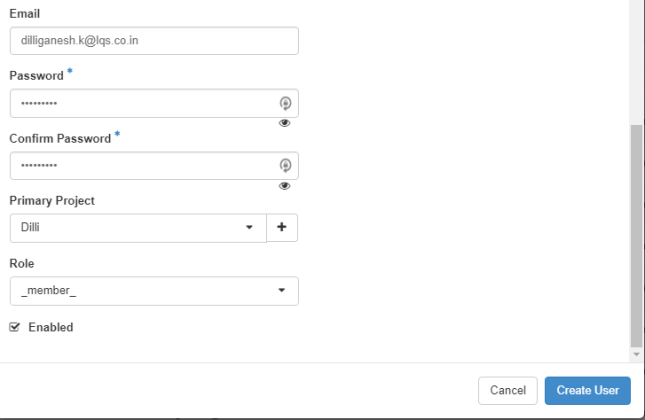
Assure that this new user has the Role assigned as a _member_ of the newly created tenant (project).
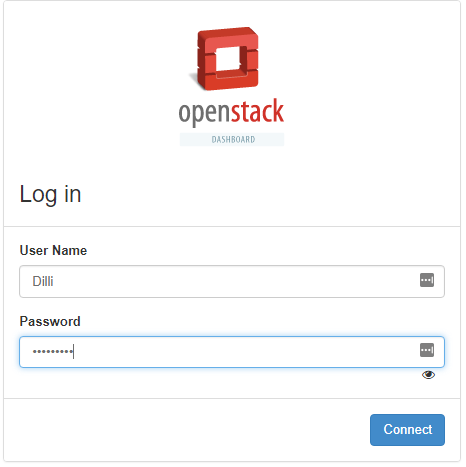
After the user has been created, log out admin from dashboard and log in with the new user in order to create two networks (internal network and external).
Navigate to Project -> Networks -> Create Network and setup the internal network
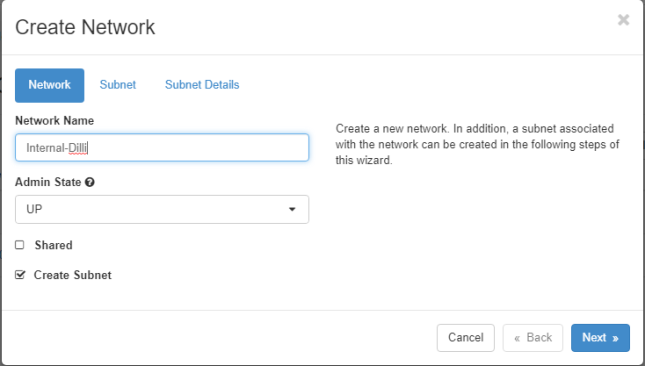
For example:
Network Name: internal
Admin State: UP
Create Subnet: checked
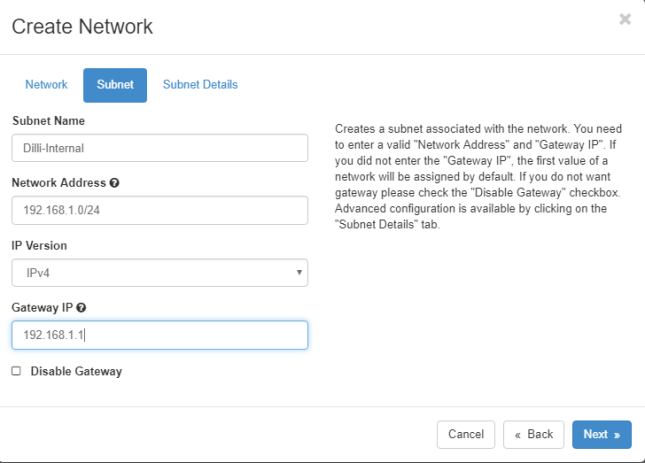
Subnet Name: internal
Network Address: 192.168.1.0/24
IP Version: IPv4
Gateway IP: 192.168.1.1
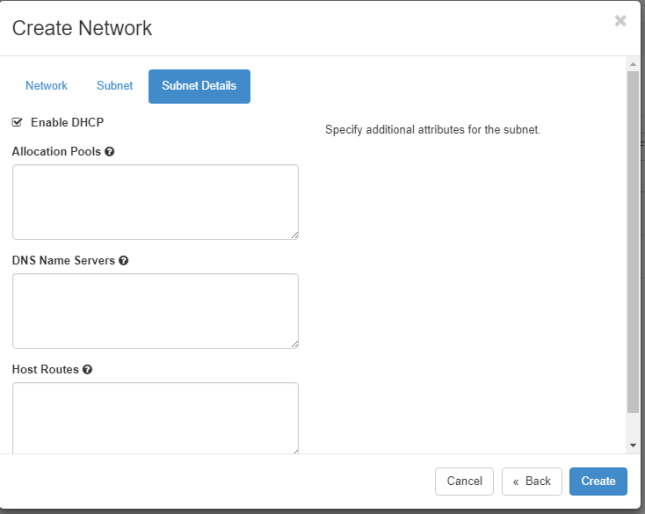
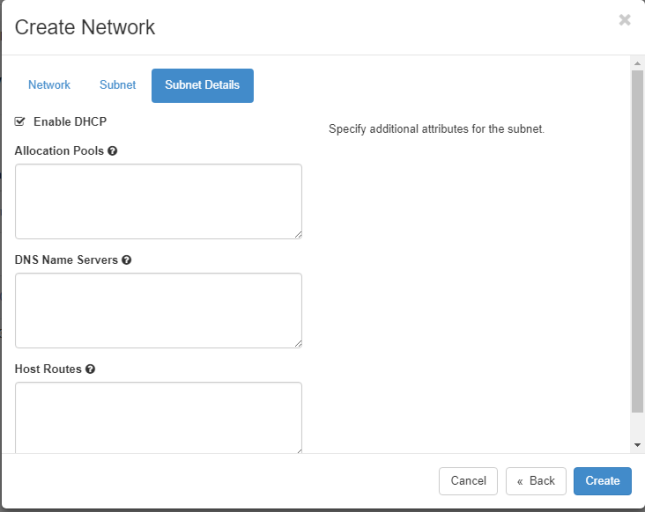
DHCP: Enable
Also, replace the Network Name, Subnet Name and IP addresses with your own custom settings.
Use the same steps as above to create the external network
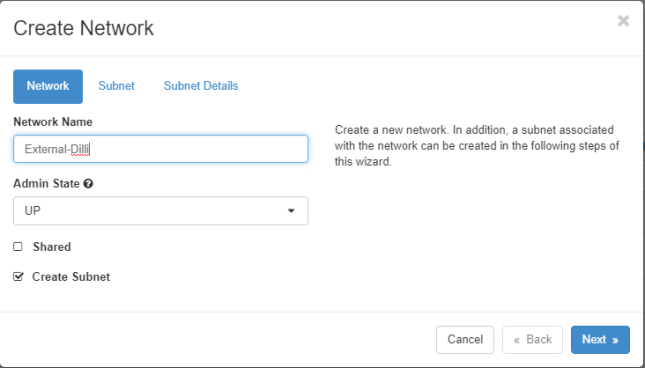
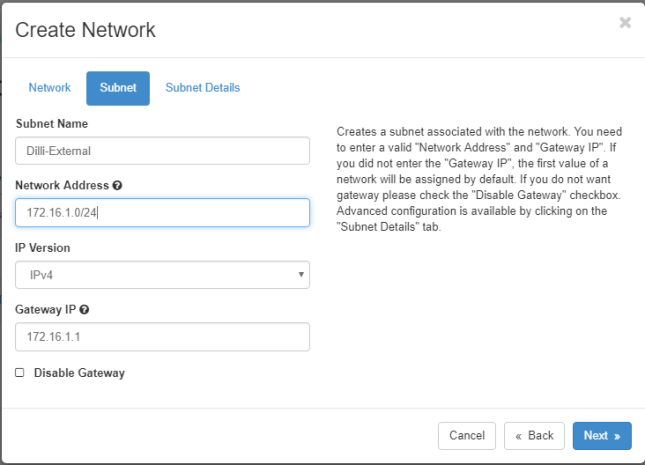
For example:
Network Name: external
Admin State: UP
Create Subnet: checked
Subnet Name: external
Network Address: 192.168.2.0/24
IP Version: IPv4
Gateway IP: 192.168.2.1
DHCP: Enable
Then replace the Network Name, Subnet Name and IP addresses according to your own custom configurations.
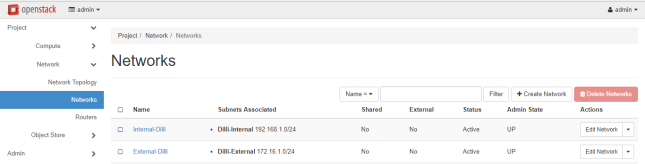
we need to log in OpenStack dashboard as admin and mark the external network as External in order to be able to communicate with the bridge interface.
Thus, login with admin credentials and move to Admin -> System-> Networks, click on the external network, check the External Network box and hit on Save Changes to apply the configuration.
When done, logout from admin user and log in with the custom user again to proceed to the next step.
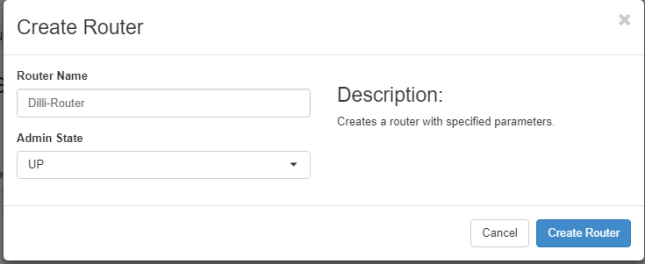
Finally, we need to create a router for our two networks in order to move packets back and forth. Go to Project -> Network -> Routers and hit on Create Router button. Add the following settings for the router.
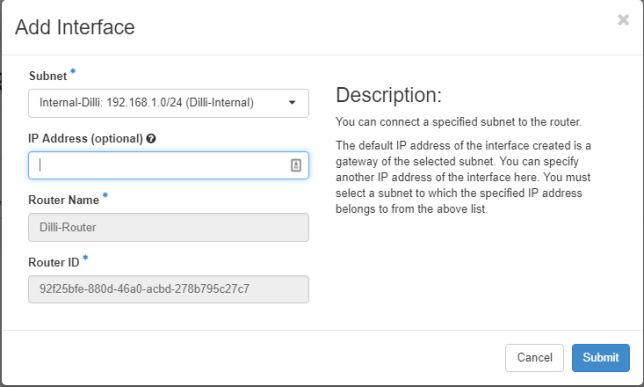
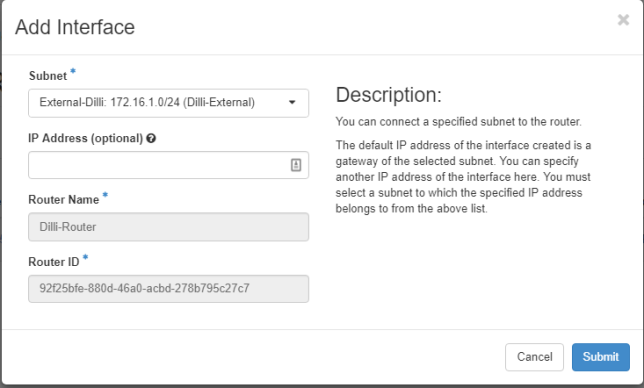
Once the Router has been created you should be able to see it in the dashboard. Click on the router name, go to Interfaces tab and hit on Add Interface button and a new prompt should appear.
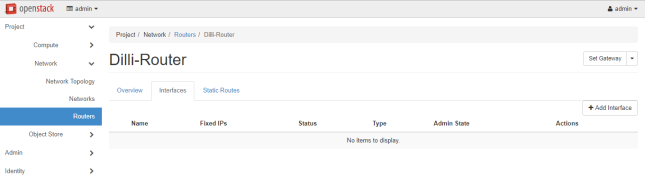
Select the internal subnet, leave the IP Address field blank and hit on Submit button to apply changes and after a few seconds your interface should become Active.
To verify OpenStack network settings, go to Project -> Network -> Network Topology and a network map will be presented
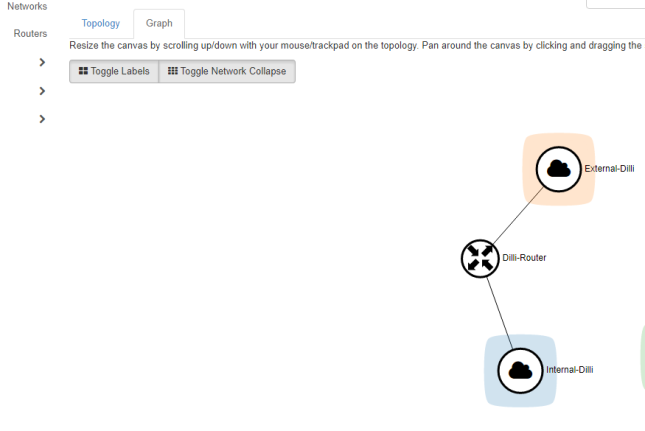
Now OpenStack network is now functional and ready for virtual machines.
